A Guide on How to Grow Sprouting Seeds
The deal is that with Sprouting Seeds, you grow your own edible sprouts at home. Besides their great taste and wholesomeness, growing your own sprouts — whether they be alfalfa, radish, bean or broccoli — has the advantage of giving you fresh, green produce, in the form of sprouts all year long. All you need are the seeds, a sprouting container and plenty of fresh water. Co-op Market sells a plethora of sprouting seeds as well as containers — both bag and jar varities. The bags can be used for any seed but are especially suited to larger, more robust seeds like beans (lentils, adzuki, mung, garbanzo), sunflower, quinoa, peas and seeds that turn gelatinous and require a lot of rinsing, like psyllium, water cress and arugula. Bags are also used to sprout heavy grains and nuts like barley, wheat, rye and almonds, which can then be milled for baking or mixed with water to make sprouted nut milks.
Preparing The Sprouts
Before placing the sprouting seeds in your impeccably clean sprouting equipment (you can find the tray pictured below in this kit), take the extra step of washing them first in a fine-mesh sieve. Measure the seeds according to the amount required for your sprouting equipment, place them in the clean sieve and rinse well with cool, fresh water.

Sprouting The Sprouts
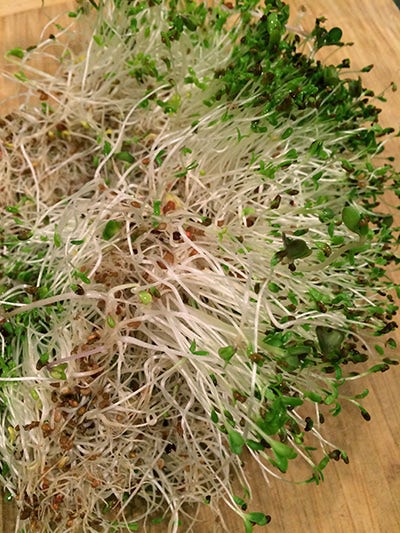
After placing the washed seeds in your sprouting container, check them daily and maintain moisture, humidity and fresh air. Place them in a bright, but not sunny, location. Your sprouts should be ready in about 5 days when they're around 1 inch to 2 inches long. If you want to green up the sprouts, move them to a bright spot and make sure they have plenty of water and fresh air for about a day before moving on to the cleaning step. It's best not to let the sprouts go for more than 5 or 6 days before cleaning them and getting them into the refrigerator to safely preserve their freshness. Because the sprouts are living off of the limited stored energy of the seed, they are unable to take in any nutrients beyond the germination stage.
Cleaning The Sprouts
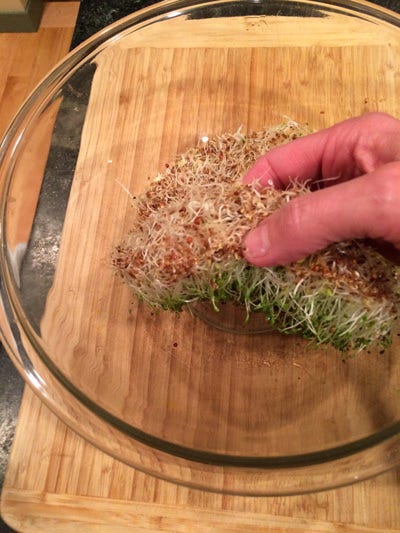
You’ll need a large, clean mixing bowl for this operation. Place the sprouts in the bowl and fill it about 2 inches from the rim with cool water. With clean hands, gently swish the sprouts around in the water, untangling them and pushing them under the water. The seed hulls will dislodge and collect at the water’s surface, the sprouts will be suspended in the water and any unsprouted seeds will sink to the bottom. Use your fingers to gently work the tangle of sprouts to one side of the bowl. As you do this, you’ll separate out any hulls or unsprouted seeds.
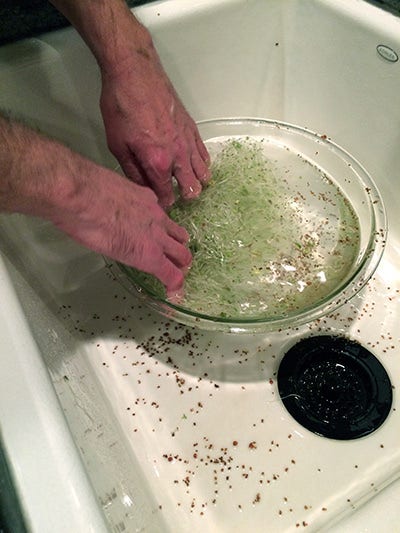
Next, while gently holding the sprouts to the side of the bowl with your fingers, hook your thumbs under the rim of the bowl and dump out the water along with the hulls and unsprouted seeds. Refill the bowl with fresh water and repeat the process a couple of times until all you have is mostly clean sprouts. Be gentle with the cleaning process, you don’t want to break or bruise the sprouts. Once cleaned, move the sprouts to a clean dishcloth or paper towel to drain. You can also use a salad spinner to get any standing water off of the sprouts.
Storing The Sprouts
You'll want to store your sprouts in a cool, humid, (but not wet or soggy) environment. Nestling them in a damp paper towel tucked inside an open plastic zip bag set in your refrigerator's vegetable crisper drawer works well. Use the sprouts promptly, within a few days. Discard if the sprouts turn slimy, start to stain the paper towel, or develop any off odors.
Eating The Sprouts
Try your sprouts piled high on a baked black bean burger with heirloom tomato, purple onion and spicy aioli sauce. You can also mix them into any tossed salad or add them to a green smoothie.